Decorative plaster can completely transform any space into surfaces that look like stone, concrete, marble, or aged European architecture. But here’s the part most people underestimate: the final finish is only as good as the surface underneath.
Even the most beautiful Venetian, Marmorino, Travertine, or concrete-effect plaster can fail, crack, peel, or look uneven if the wall isn’t prepared correctly. This guide walks you through how to prepare walls for decorative plaster step by step, whether you’re a DIY enthusiast or a professional installer.
Why Wall Preparation Matters So Much
Proper wall preparation isn’t just a technical step; it’s the foundation that determines how durable and visually stunning your decorative finish will be. Decorative plasters are often applied in thin, textured layers. Unlike standard paint, they don’t hide major surface problems — they can actually highlight them.
Poor prep can lead to:
- Visible cracks telegraphing through the finish
- Uneven absorption causing blotchy color or sheen
- Weak adhesion that leads to peeling or flaking
- Texture inconsistencies that ruin the intended effect
Proper preparation ensures:
- Strong bonding between plaster and wall
- Even drying and color development
- Long-term durability
- A smooth, professional-looking result
What Surfaces Can Decorative Plaster Be Applied Over?
Decorative plaster can go over many surfaces. Before you even think about texture or color, you need a stable, clean, and structurally sound base. It’s also important to understand situations where decorative plaster may not be the best choice, since certain surfaces and environments can lead to adhesion or durability issues.
Suitable surfaces (with proper prep):
- Cement or lime plaster
- Gypsum plaster
- Drywall (sheetrock)
- Concrete
- Previously painted walls (if stable and well-adhered)
Surfaces that need extra care:
- Glossy or semi-gloss paint (must be dulled)
- Old walls with multiple paint layers
- Surfaces with hairline cracks
- Areas exposed to moisture or humidity
Surfaces to avoid (unless fully treated):
- Loose, chalky, or powdery walls
- Damp or water-damaged substrates
- Peeling paint or flaking old coatings
Follow these 7 Steps to Decorative Plaster Wall Prep
Step 1: Check for Structural and Moisture Issues
Before cosmetic prep begins, inspect the wall carefully.
Look for:
- Active cracks that continue to widen
- Water stains or damp patches
- Mold or mildew
- Soft or crumbling plaster
Decorative plaster should never be applied over damp or unstable surfaces. Moisture trapped behind the finish can cause bubbling, staining, or adhesion failure. If you find moisture problems, always fix the source first. Proper surface preparation is especially important for textured looks like concrete-style decorative plaster finishes, where surface movement and imperfections can affect the final pattern.
Step 2: Clean the Surface Thoroughly
Decorative plaster needs a clean surface to bond properly.
Remove:
- Dust and dirt
- Grease or oils (especially in kitchens)
- Soap residue
- Construction debris
Use a damp sponge or cloth for light cleaning. For greasy areas, a mild detergent solution may be necessary. Let the surface dry completely before proceeding. Even a thin film of dust can weaken adhesion.
Step 3: Remove Weak or Peeling Layers
Plaster is only as strong as what’s underneath it.
Scrape away:
- Peeling paint
- Flaking plaster
- Bubbling or blistered coatings
If the old paint is glossy, sand it lightly to create a dull, slightly rough surface. This helps primers and plaster grip better. After sanding or scraping, wipe the wall again to remove dust.
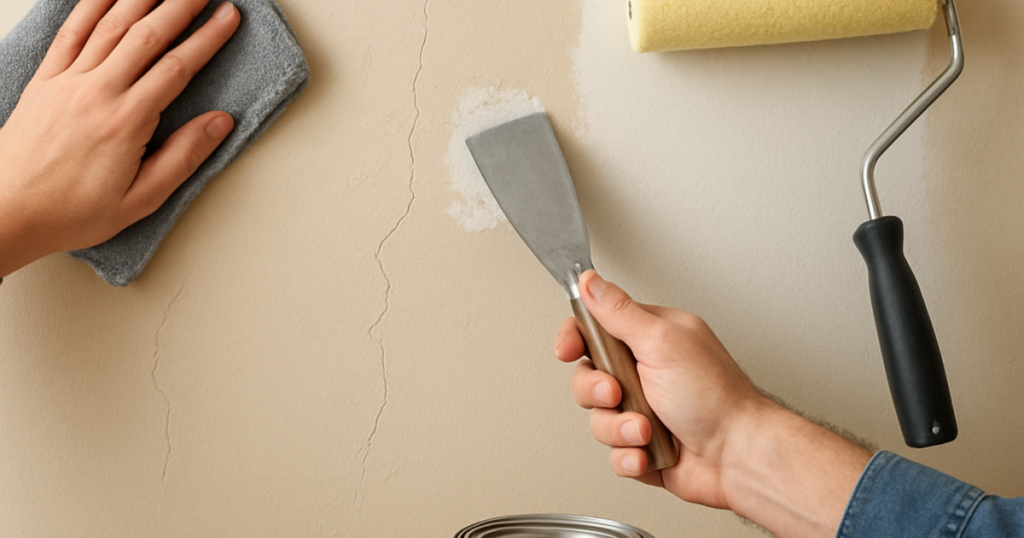
Step 4: Repair Cracks and Surface Defects
Decorative plaster can mask minor imperfections, but it cannot fix structural damage.
Repair:
- Small cracks with flexible filler or patching compound
- Holes and dents with a suitable wall filler
- Uneven patches by sanding smooth once dry
For larger or recurring cracks, use fiberglass mesh tape embedded in filler to reinforce the area. Once repairs are dry, sand the surface so it feels even to the touch. You don’t need a perfectly polished wall, but you do need one that’s uniform and stable.
Step 5: Control Surface Absorbency (Critical Step)
This is where many DIY jobs go wrong. Different wall areas can absorb moisture at different rates.
Without proper priming, this leads to:
- Uneven drying
- Patchy color
- Visible application marks
A deep-penetrating primer helps stabilize porous or chalky surfaces by binding loose particles and reducing uneven absorbency. This step is especially important on:
- Old plaster
- New drywall
- Repaired areas
A penetrating acrylic primer like Daricco Deep Grunto is designed specifically for this purpose, helping create a more uniform and reliable base before decorative layers are applied. Allow the primer to dry fully according to manufacturer instructions.
Step 6: Apply an Adhesion (Bonding) Primer
Decorative plaster needs “tooth”, which is a slightly textured surface that helps it grip. This is where a quartz or sand-filled primer comes in. These primers contain fine aggregates that create a roughened surface, improving mechanical adhesion.
Benefits of using an adhesion primer:
- Better grip for heavy or textured plasters
- Reduced risk of sliding or sagging during application
- More even texture development
For many textured decorative plasters, a product like Daricco Fondo (a quartz-filled primer) is used before applying the finish coat. It also helps regulate absorbency and strengthen the overall system. Apply evenly with a roller or brush and allow it to dry thoroughly.
Step 7: Consider a Basecoat for Color Uniformity
Some decorative plasters are partially translucent or applied in thin layers. In these cases, the color of the wall underneath can influence the final appearance. A background latex basecoat in a similar tone to the final finish can:
- Improve color depth
- Reduce the number of plaster layers needed
- Help achieve more consistent results
Products like Daricco Basecolor are often used as a background paint before decorative finishes, especially when working with light or natural stone effects.
Common Wall Prep Mistakes that Ruin Decorative Plaster
Decorative plaster is a system, not just a single product. Every layer plays a role. Avoid these frequent errors:
❌ Skipping primer: This often leads to uneven drying and poor adhesion.
❌ Applying over dusty walls: Dust acts like a barrier between the plaster and the surface.
❌ Ignoring moisture issues: Moisture can cause staining, bubbling, and long-term failure.
❌ Leaving glossy paint unsanded: Smooth, shiny surfaces reduce mechanical grip.
❌ Rushing drying times: Each layer — filler, primer, basecoat — needs proper drying before the next step.
Do Walls Need to Be Perfectly Smooth?
Not necessarily. One of the advantages of many decorative plasters is that they can hide minor imperfections and add visual texture. However, the wall must still be: Stable, clean, evenly absorbent, and free of loose material. Think of prep as creating a reliable canvas, not a flawless one.
When to Call a Professional
It may be worth bringing in a professional because decorative plaster is a premium finish that requires proper prep and application to ensure the investment pays off. You should especially contact a professional if you are dealing with structural cracks, extensive water damage, severely uneven walls, or dealing with large commercial spaces.
Final Thoughts
Decorative plaster delivers depth, texture, and character that paint alone can’t match — but it demands proper preparation. When these steps are followed, decorative plaster adheres better, looks more refined, and lasts for years. To recap, successful wall prep includes:
- Fixing structural and moisture issues
- Cleaning thoroughly
- Removing weak layers
- Repairing cracks and defects
- Applying a deep primer
- Using an adhesion primer
- Adding a basecoat when needed